Before placing or receiving a call, you need to have an active phone number on your Wavix account. If you already have one, you can skip this section.
To purchase a number:
Sign in to your Wavix account
Click on Buy under Numbers & trunks in the top menu
Select the country and region where you wish to purchase a number
Choose a specific number or numbers and click the Buy now button
You will be redirected to the Cart, where you can confirm your choice and check the numbers out
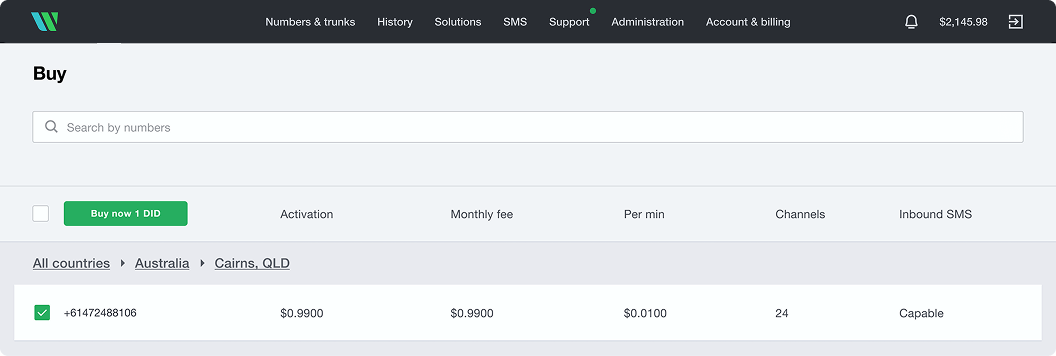
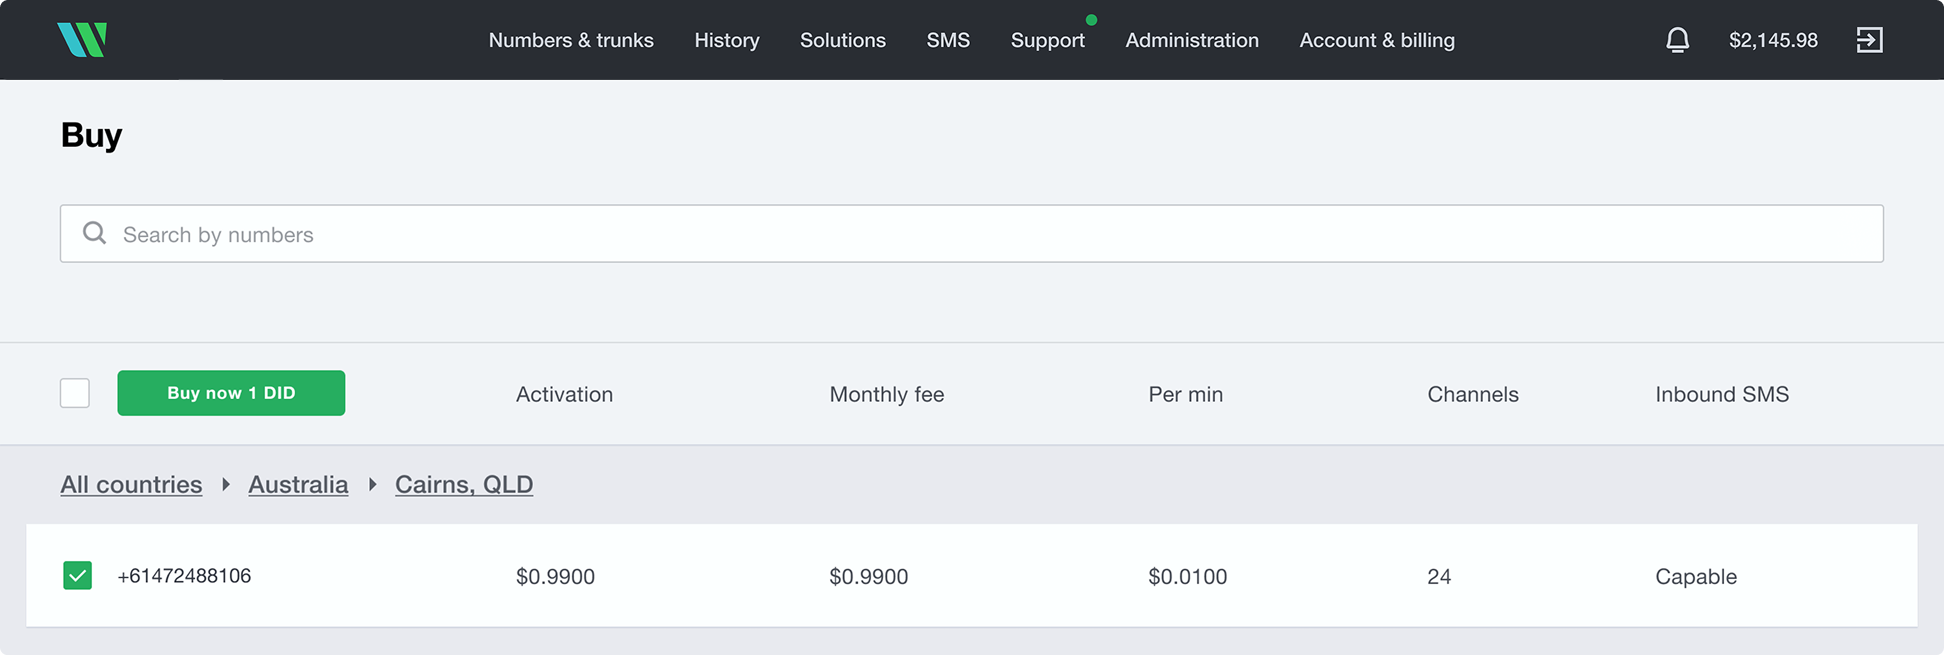
Fig. 1 Search and Buy a number
Note
Some numbers may require proof of local address and other documents before activation. To activate these numbers, upload the requested documents and wait for the Wavix Provisioning team to approve them before the numbers become active.
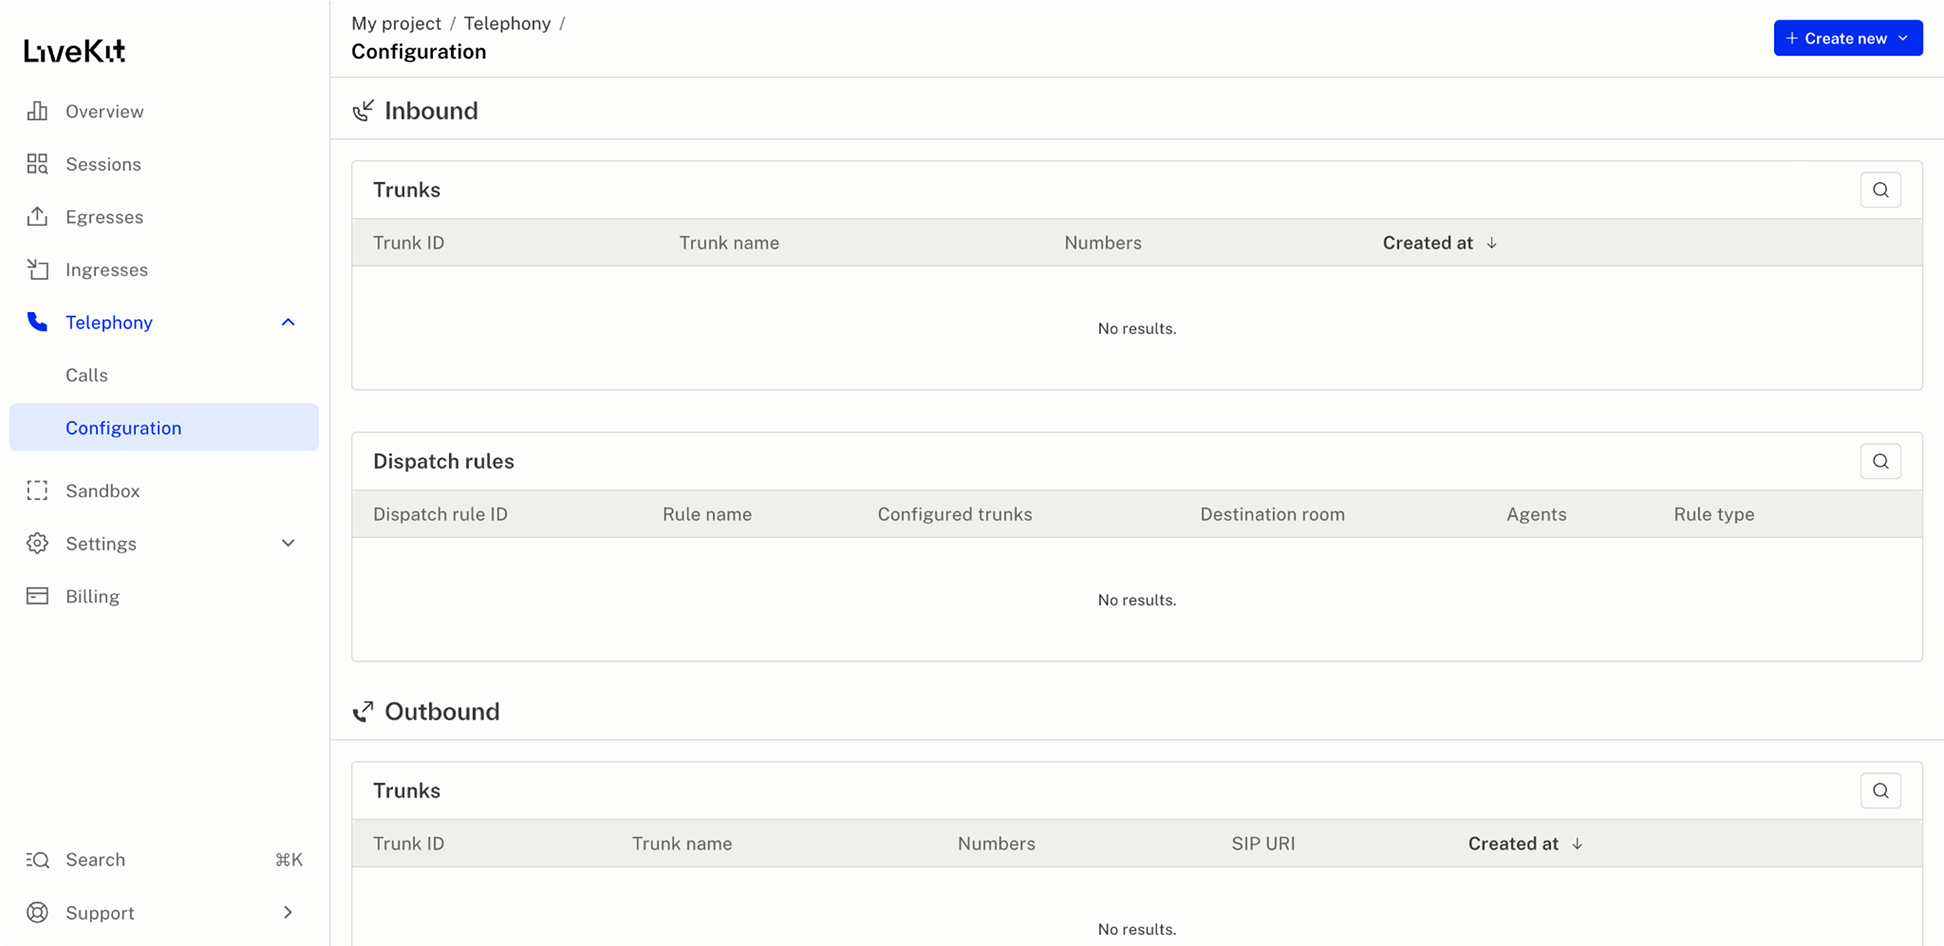
Fig. 2 Configure LiveKit telephony
To create an inbound trunk:
Sign in to your LiveKit project
In the left-hand side menu, select Configuration under Telephony
Select the +Create new button and choose Trunk
Enter a comma-separated list of Wavix numbers to associate with the trunk
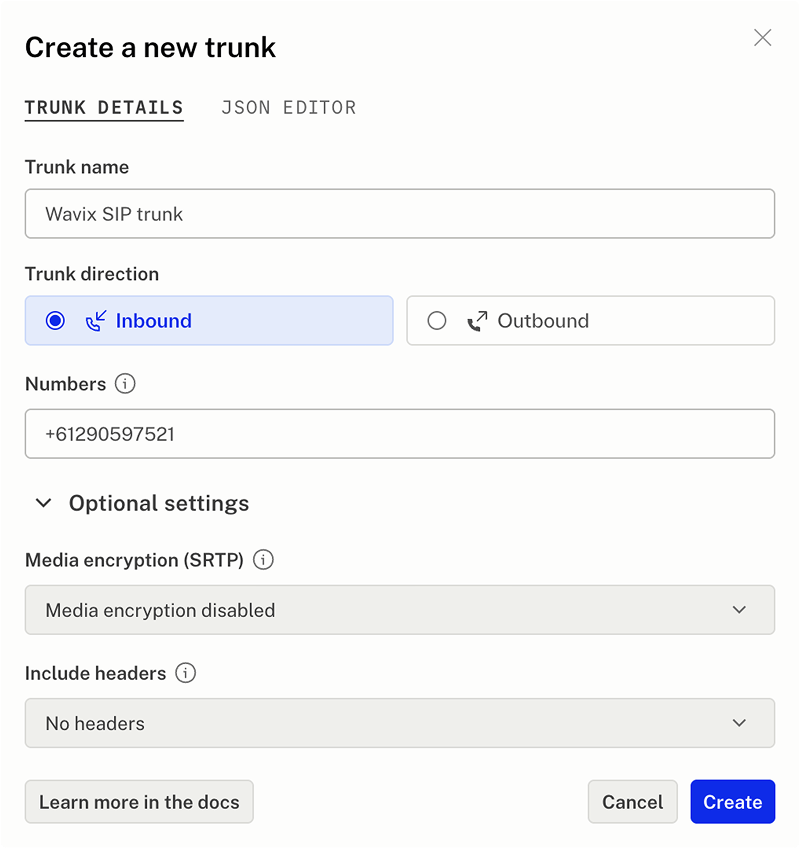
Fig. 3 Set up LiveKit inbound trunk
Information
To create a LiveKit inbound trunk using the LiveKit CLI or code, visit https://docs.livekit.io/sip/trunk-inbound/
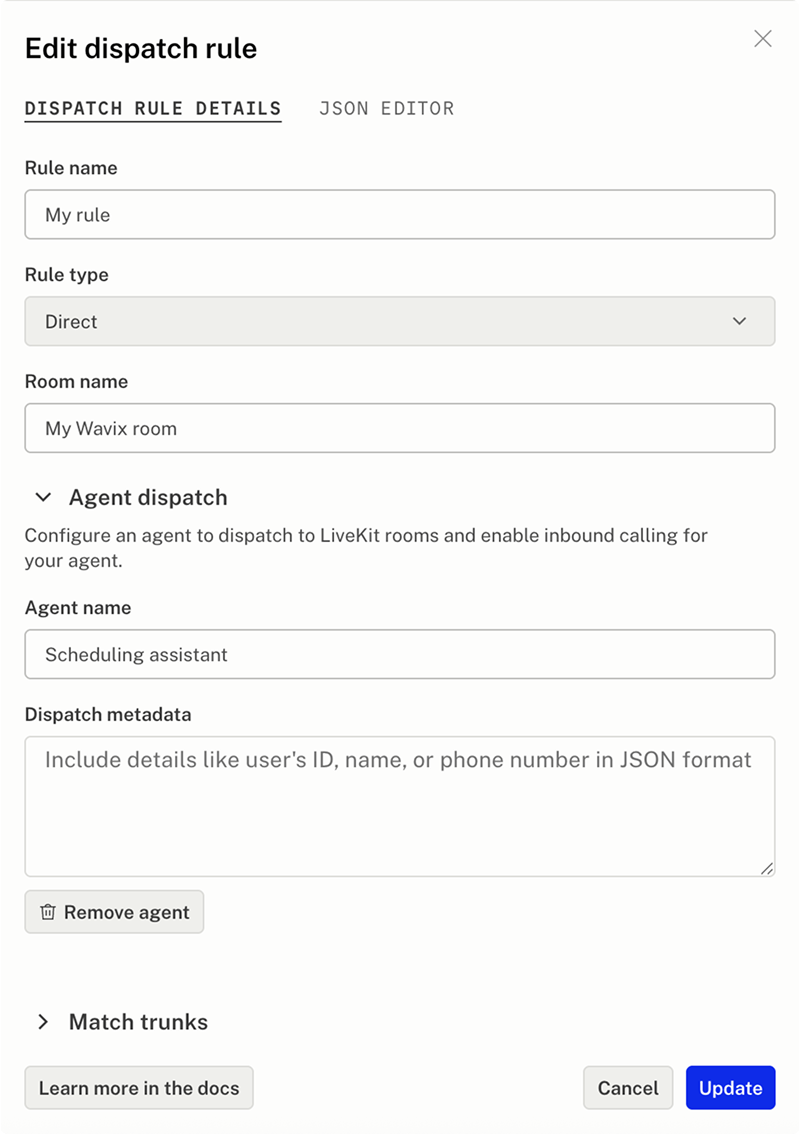
Fig. 4 Create a dispatch rule
Dispatch rules determine how inbound calls are routed to LiveKit rooms. Learn more about the Dispatch rules at the LiveKit website.
To create the Dispatch rule, click the +Create new button and select Dispatch rule.
By default, the Dispatch rule will apply to all inbound calls for your LiveKit project. You can associate it with a specific trunk under the Match trunks section.
Information
To create a dispatch rule using the LiveKit CLI or code, visit https://docs.livekit.io/sip/dispatch-rule/
Wavix can route inbound calls to a SIP trunk on the platform, SIP URI, or forward them to a phone number. LiveKit requires calls to be routed to a SIP URI.
To find the SIP URI:
Sign in to your LiveKit project
In the left-hand side menu, select Project under Settings
The SIP URI appears in the SIP URI field. In our case it is sip:2mpbww13htk.sip.livekit.cloud. We’ll use only the part after the colon to configure inbound call routing on Wavix.
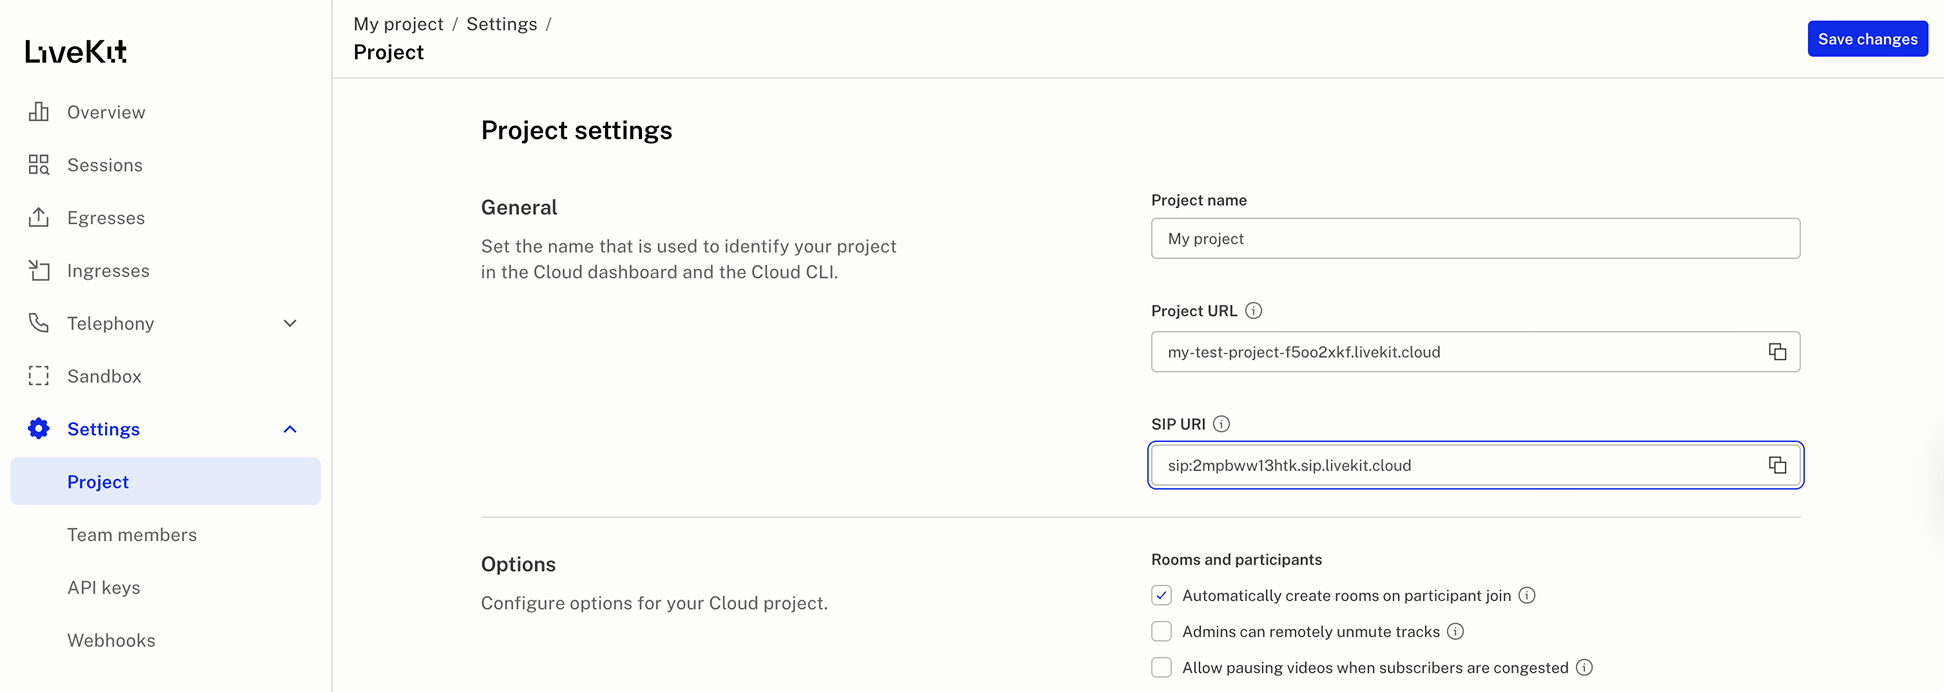
Fig. 5 LiveKit SIP URI
To route calls to your Wavix number to the LiveKit AI platform:
Sign in to your Wavix account
Navigate to My numbers under Numbers & trunk in the top menu
Click the three dots on the right-hand side, and choose Edit number
Set the inbound call destination type to SIP URI and enter the destination in the format of [did]@[LiveKit SIP URI].In our case it will be [did]@2mpbww13htk.sip.livekit.cloud.
Click Save
Note
Make sure you entered the correct LiveKit SIP URI.
Now, all calls to your Wavix number are routed to your LiveKit AI project. Deploy a LiveKit agent to answer the calls.Check the LiveKit recipes for voice AI and LiveKit Agent use cases.
Note
You can choose to encrypt call media. To enable encryption on your Wavix numbers, contact support@wavix.com and provide a list of the numbers.
To place outbound calls with LiveKit and Wavix, you’ll need to:
Create a SIP trunk on Wavix
Create an outbound trunk on LiveKit
To create a new SIP trunk on the Wavix platform:
In the top menu, navigate to Numbers & Trunks and select Trunks
Click the Create new button
Under Authentication Method, select Digest
Enter a SIP trunk name, set a SIP trunk password, and choose one of your account’s numbers as the Caller ID
Max outbound call duration
Max number of simultaneous calls via the SIP trunk
Max call cost
Click Create

Fig. 6 Configure a SIP trunk
Once the SIP trunk is successfully created, it will appear in your account’s SIP trunks list.
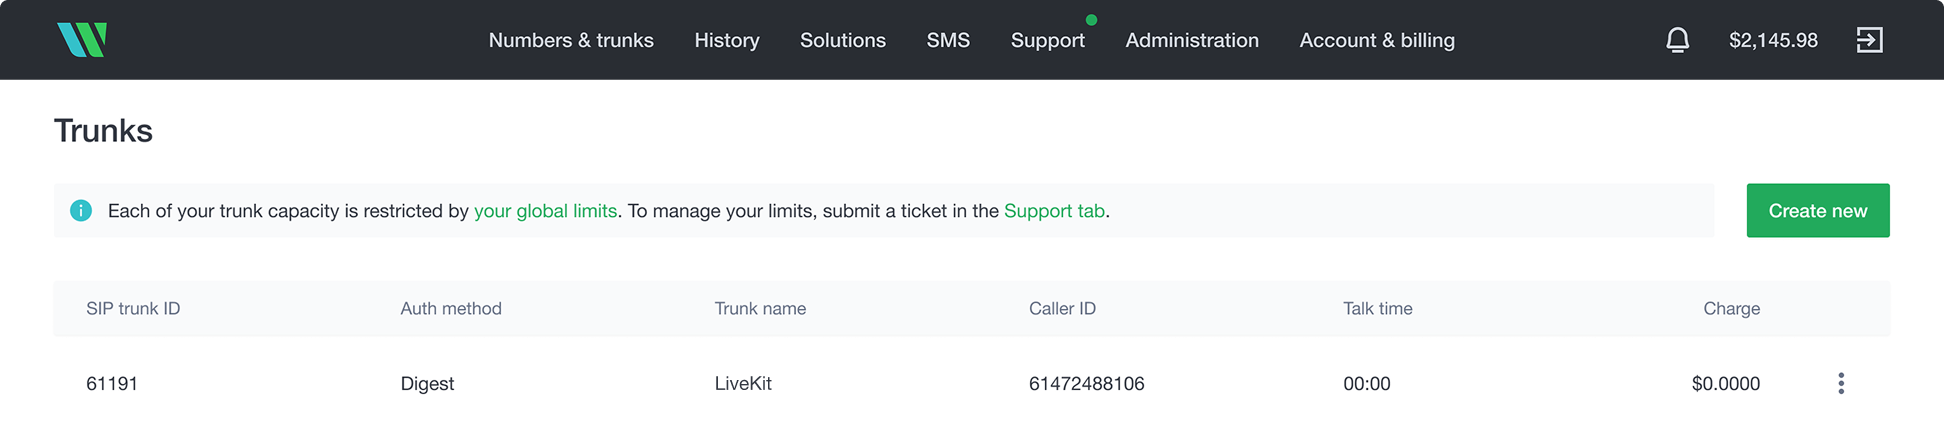
Fig. 7 List of SIP trunks and SIP trunk ID
Note
Please be advised that your 5-digit SIP trunk username is generated automatically and displayed in the SIP trunk ID column
Follow the steps below to create the trunk with LiveKit:
Sign in to your LiveKit account
Select the Configuration under Telephony in the left hand side menu
- Replace <YOUR_SIP_TRUNK_ID> and <YOUR_SIP_TRUNK_PASSWORD> with the SIP trunk credentials configured on the Wavix platform.
- Replace 61290597521 with the phone number purchased on your Wavix account
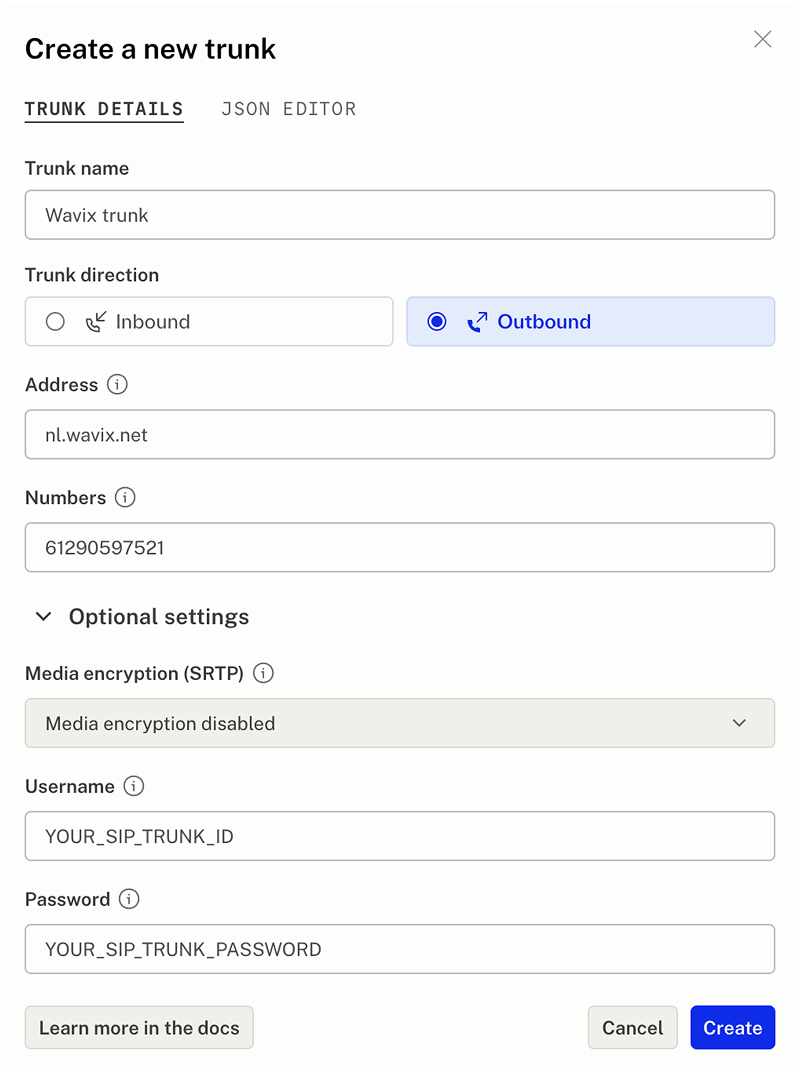
Fig. 8 Create a LiveKit outbound trunk
Information
To create a LiveKit outbound trunk using the LiveKit CLI or code, visit https://docs.livekit.io/sip/trunk-outbound/
Note
You can choose to encrypt call media. To enable encryption on your Wavix trunk, contact support@wavix.com and provide your SIP trunk ID.
You’ve connected LiveKit with Wavix and now can place outbound calls. Check the LiveKit recipes for voice AI and LiveKit Agent use cases.
Wavix supports cold call transfers using the SIP REFER command. To transfer a call, you need two Wavix numbers—one for an active call and one to receive the transferred call. Make sure inbound call routing is set up on the second number. For details, see the Setup inbound call routing on Wavix section.
Note
A cold transfer means the call is transferred without notifying or speaking to the new recipient
To transfer an active LiveKit call, use the TransferSIPParticipant server API.

Copy
Copy
Replace transfer_destination with your Wavix number. Use the following format:sip:+[YOUR_WAVIX_NUMBER]@[WAVIX_SIP_GATEWAY]Example: sip:+61290597520@au.wavix.net
Note
Choose the primary gateway with the lowest ping from your location. A full list of Wavix regional gateways is available at the bottom of the page: https://app.wavix.com/trunks
Information
Learn more about LikeKit call transfer at https://docs.livekit.io/sip/transfer-cold/
- 603 Declined response might be received when calling the destination with the per-minute rate higher than the Max call rate set for your account. You can find your effective Max call rate on the Trunks page. Please contact support@wavix.com to request a change to your Max call rate
- Another possible reason for the 603 Declined responses might be the lack of active registration. You can check the registration status of the SIP trunk as outlined above.
- The destination number format is wrong. Make sure you dial the full international number (E.164): 19085594899 (US), 4408001218915 (UK). Dialing 9085594899 won't work. Strip prefixes like 0, 00, or 011 before the dialed number.
Easily integrate Wavix with LiveKit to build smart, scalable voice AI experiences in just minutes